Radio Shack and Heathkit catering to the Amateur market?

I really hope so.

How many HAMs been to a Radio Shack recently? I have and it’s sad… really sad. Over the years, the component and DIY electronics section of Radio Shack kept getting smaller and smaller. The cell phone section kept getting bigger and bigger to the point where the electronics section is just a couple of cabinets and a 6ft wall of soldering irons (that are not good for SMD type soldering) and their assessories. And that’s even if your lucky enough to come  across a store with an electronics section. Now you go in looking for a component but instead you get hassled by the untrained staff to get you to buy a cell phone or batteries.  I am not old enough to know what it was really like but the Radio Shack catalog was what really got me interested in wireless communications. I was “oooh”ing and “awww”ing  over the things that were in there and I just had to get my hands on a CB radio.

The only thing I don’t get was WHY? Why did radio shack go the cell phone store route? Is it because of the high margin of cell phones, low overhead and back-end benefits to drive up profits? Damn right! IMO Radio Shack decided changing to a cellular phone store too late when there are already hundreds of  established stores within a 10mi radius that sell the same contracts, phone and accessories. That combined with the BIG box electronic stores, online electronic parts dealers (that dominates RSs markup) and the fact that most electronic devices are either no longer serviceable or too complicated  drove Radio Shack into a deeper hole which I thought were never going to dig out of. Heck, even The Onion made fun of Radio Shack.

In recent months, someone at Radio Shack finally kicked the board members (or whomever runs Radio Shack) in the ass and woke them up to a grim reality of what will happen to Radio Shack if they do not do something (Well, that’s what I imagine happened). Recently Radio Shack  is trying to dig and is going back to its roots and asked the DIY electronics community for help. Based on their answers, they actually posted a list with the Top 10 suggestion.  You will notice that HAM radio is listed and I hope that this is not a sales gimmick or some kind of publicity stunt or marketing ploy. At this point in time it looks like Radio Shack is joining up with Parallax (Company that manufactures and sells electronic kits) to release DIY electonic kits to the masses. I just hope with the quantity of product that RS is buying will lower the price.

I’m not sure if it’s directly related but a brand that almost every Amateur Radio Op knows is also throwing their hat in the DIY electronics game (again). HEATHKIT announced that they are getting back into the DIY Electronic kits for the consumer. They are starting out with a Garage Parking Assistant and a wireless swimming pool monitor kit with many other kits planned for the future. HEATHKIT is also asking for input from the DIY electronic community. So if you’re a ham (or not!), I would e-mail info@heathkit.com and let them know that there should be Amateur Radio related kits!

I never had the chance to actually build anything from Heathkit so I hope a something come across that I’m interested in learning! Maybe teach the kids when they are old enough about basic electronics.


HRD Log Book , MySQL & Godaddy = Not Sure

I wanted to find another way to display my logbook other than using the code generated by hrdlog.net. After searching around I found a couple of articles that discussed using HRD’s Logbook with MySQL. Since my godaddy account comes with MySQL, I thought it would be a great idea to create a database and have HRD Logbook update the MySQL database on godaddy’s server rather than saving it on my computer. There is a couple of great reasons for doing this. One is that my logbook is being saved online. If my computer were to fail or I had to reformat. My information is updated and online. The other reason is that I can basically update my logbook from anywhere and retain only one logbook. There is also a script/plugin that will display your logbook online with wordpress (Script I use to publish on N1BMX.com).

After setting it up I noticed that the Log Book takes a long time to load and a very long time to add a QSO. It works, but really slow. It’s slow enough to the point where I did not want to use it anymore. It took minutes to add to the database which when contesting or even trying to handle one QSO after another, it proves to be a big pain. I am not sure if this is because of Ham Radio deluxe or Godaddy’s MySQL server. Someday I will revisit this.

I ended up trying to revert back to using Microsoft access database which all hell broke out when using Ham Radio Deluxe. It basically slowed it down to where it crashed upon load or when I tried to look up a callsign. I’ve tried to uninstall HRD and reinstall with no luck. It was to the point where I stopped using HRD and started looking at other software to replace HRD as I was getting really annoyed. It even slowed down my Ham Radio usage to SSB and a paper log.  Today (6/12/2011) I was determined to get HRD back running with logbook and Digital master working together without a hiccup. I finally got to uninstall HRD, Re-Install and have everything work.

Here is what I did (AT YOUR OWN RISK!)

– Exported Database to ADIF file and placed on keydrive
– Uninstalled HRD via Windows control panel
– Deleted “C:\USERS\*****\AppData\Roaming\Simon Brown, HB9DRV” (Or rename it). The Appdata folder is Hidden and you have to change the folder settings in windows to display hidden files or folder
– Searched the Registry and removed HRD (HKEY_CURRENT_USER\Software\Simon Brown\HamRadioDeluxe)
– Removed OCDB’s related to HRD (Windows 7 Start>Control Panel>System and Security>Admin Tools>Data Sources>Highlight any HRD database>Remove. If it does not remove try using the registry editor to remove the database links Start>Type “Regedit>HKEY_LOCAL_MACHINE\Software\ODBC)
– Reinstalled HRD
– Imported ADIF file to new log book

Please note that ALL your settings will be gone (Unless you backed up the folder located in appdata) and will have to be re-entered. It’s a bit of a pain but well worth it to get your logbook and/or HRD software running fast again.

I am sure it could work on a Different SQL server but I’m sharing my experience. I hope to try this again. Until then I am using HRDLOG.net and using their script on this site for you to see My Logbook.

Resources:
PA1JIM HRD Script – This is the Scirpt I used to display information from the MySQL Database to my website
KB3LMC Howto – This site will show you step by step on how to setup MySQL on your computer (Even though for Mac, Instructions are similar using windows).

I’ve gone Bat$#!t – Hello Moto(rola two-way)

In the past couple of weeks I picked up a couple commercial two-way radios. I’ve purchased a Motorola Maxtrac 300 (Mobile) and a XTS 3000 (Handheld).

I’ve been a fan of commercial radios since I got my hands on a HT1000 and beat it up pretty good. I’ve dropped it, thrown it, threw it into a puddle and who knows what else and they always worked out.

There are PROs and CONs about owning a commercial radio for Amateur use. One of the CONs is programing. Unlike amateur radios, the majority of commercial radios have to be programmed. With Motorola, depending on the situation, the software that is used to program these radios will end up costing as much as half (or more) of what you purchased the radio for.  You could also have a local dealer program the radio. Another one of the CONs is the ability to change the frequency “On The Fly”. You can only change to a frequency (Channel) that is programmed into the radio.

One of the PROs are that you will get a radio that is built to public safety and/or military specifications. These radios can take a lot more abuse then it’s amateur counterpart. Another PRO is that these radios are built as “Part 90”  (Public safety, Private business, municipal, etc) radios. That means you can use these radios in both the LMRS and Amateur frequency blocks. Your not allow to take a amateur radio and modify it to transmit in the LMRS. So if you have a job that uses radios in the LMRS blocks or you want a radio that can do both GMRS/UHF (Or MURS/VHF) then you will have a radio that will possibly cover all 3 possibilities.

Motorola Maxtrac 300 (UHF)

This is the Maxtrac 300 I got on e-bay for around $100. It was being advertised as a 430-470mhz split which is rare but when I hooked it up to the computer, it was the 450-470mhz split.

Just a note for anyone that is looking to buy this or it’s GM300 brother on eBay. Make sure the auction has the Model number in it.  For example, the model number D34MJA7JA5AK means that’s it’s a  10-25w (2nd Number[3]), UHF (3rd # [4]) Conventional (Numbers 4,5,6 and 7[MJA7]) 32 Channel (8th # [J]) A5 HEAD (9,10th #) Revision K (Last Digit).

So now you know your getting 10-25 watt 32 Channel UHF radio. However these types of radios have 2 splits per band. On Uhf you could get getting a 403-430 or 449-470 split. I’ve read that there is a 430-470 Split RF but I have yet to see it. The only ways to tell what split the radio is, by looking at the radio in the RSS (programing) software or actually opening up the radio to see what the part number is on the RF Board.  So be careful if your looking for a Ham band Maxtrac.


Motorola XTS 3000 (UHF R)

This is my Motorola XTS 3000 UHF Handheld radio. I purchased this item because the “But It Now” price was just where I wanted it. Another reason is that it can decode/encode P25 Digital. Always wanted to mess around with it and now I have the chance. Only issue is that there is only two P25 systems for ham radio in the state of Massachusetts and they are both located out of range. If there is enough interest in the area, I would like to setup a repeater capable of P25. We’ll see…

Thanks for reading!


OSJ-Pole – Adjustable

The thing that amazes me about the Open Stub J-Pole is it’s simple design that performs well. I am not saying it will out-perform commercially built high-gain antennas but that it performs well using a few parts. I think it’s even easier than building a copper J-pole and even ground plane antennas (maybe just a step up).

One of the big complaints that I’ve been reading about the Open Stub J-Pole is that it’s difficult to tune. The only way to tune the antenna is to actually cut the stubs a little bit at a time. If you cut too much the stub is now worth it’s weight in scrap.

Now that I am the owner of a GMRS radio, I wanted to build a OSJ-Pole that you can adjust with ease. I found plans on the internet for a  Copper Cactus J-Pole that used a brass screw threaded into the “Tuning element”, or the Short stub (By Glynn Rogers, K4ABT).   I am using that idea on the OSJ-Pole. What I ended up doing is cutting about 3/8″ off the top of the short stub, drilling a hole down the center of the rod, tapped it with a 10-32 thread and inserting a screw with a jam nut. Now I can move the screw in and out to obtain the best SWR and then tightening the jam nut to secure the screw.

Here is a picture of what I am talking about

Adjustable Open Stub J-Pole

I tried to make a custom angle bracket with what I thought was the correct spacing  but the SWR was horrible So I used a extra bracket from one of the many Dual Band OSJ-Poles I’ve built. It worked out pretty well.

Close up of "AOSJ-Pole"

Here is a close up of the tuning screw.  I ended up using a lathe and a drill bit (.159) to put a 2″ hole at the end of the 3/8″ round short element. I then used a bottoming tap to make the 10-32 threads as far as I can go. I then used a 1-1/2″ Screw and a 10-32 Jam nut to lock the screw in place. I am sure this can be applied to any of the Open Stub J-poles that are out there. Just make sure to cut some material off the elements so you have room to adjust above and below the calculated line. For the dual band you’ll have two adjusters. Since most people don’t have lathe access to make the hole in the center of the 3/8″ rod. A vice, center punch (automatic or not) and a steady hand with a drill will do. I would make a pilot hole with the smallest drill bit in your stock (under #21 or .159″).

I was able to tune the AOSJ-Pole from a 1.5 to a 1.0.  Since I am building more and more antennas, I saving my pennies to buy a antenna analyzer so I can give better reports with more information than what I am getting on my SWR meter.

Next project will be a GMRS 4 Element Yagi.


Homebrew Rigblaster Nomic Data Cable

Since I got the SignaLink I figured I can mess around with the Rigblaster.  I wanted to adapt it to the FT-100 so If I ever go out with it and a laptop, I can do some digital work using the rigblaster as a interface.

On their website they posted a article “Connecting your FT-897 to The Rigblaster NOMIC for digital operation” (Written By Jeff, K8YSV).

I Followed the directions to the T and here it is!

Just some things I would like to point out. The FT-817, FT-857D, FT-897, FT-100D, FT-950,  FT-2000 and I am sure many other makes and models use the MINI 6 PIN DIN connector which is the same as a PS2 cable that you find on a semi older keyboards and mouses (mice). I thought it would be easy and just find a old mouse or keyboard, clip the wire and use the connector. Well guess what? The PS2 Mouse and keyboard use 4 out of the 6 pins and the two that have nothing connected to them are need to wire up for the Yaesu rigs. You just might be lucky and come across a cable that works. I went through about a dozen keyboards and mouses until I gave up. Getting frustrated I went on Ebay and picked up a 6 pack of connectors for $10 w/ shipping.

If you follow the entire article on the above link you can make a cable with just basic soldering skills.  I added a ferrite choke to the data and audio cables to help cut down on the noise generated from nearby objects.

After constructing the cable and testing it out, I wasn’t too impressed on it’s performance compared to hooking the NOMIC up using the Microphone jack and audio patch cables.

I notice it didn’t sound right. I don’t have the proper analyzing equipment to give a detailed reason why but if you look at the band edges on the above picture, you will notice a drop off which I never seen with the unit normally hooked up. I also notice that the audio is not as strong either. I had to max out all the settings on my soundcard and radio. Even with the levels maxed and removing the resistor on the NOMIC board,  the audio still seemed low.

Overall I am not too thrilled about the outcome of the cable but it works. It makes it possible to use the microphone again and It’s going to help on a future project I have in the works.

Tigertronics SingaLink USB

Recently I purchased a SignaLink USB from HRO in NH to replace my Rigblaster Nomic. The Reason for doing so is that the SignaLink has a built in sound card. That means only one connection to the computer is required. It also Isolates the soundcard so I do not have to adjust my computers sound card every time I want to use digital.

Price (@ HRO): $99
Platfrom Installed on: Windows 7
Radio Used On: Yaesu FT-950
Software Used With: Ham Radio Deluxe, WSJT

When purchasing the SignaLink you can either get one to adapt to your microphone jack or your data jack (If you have one). Since the FT-950 has a RTTY/PKT port on the rear of the rig, I purchased the SL-USB–6PM. The 6PM stands for “6 PIN MINI” which is what the RTTY/PKT Port uses (Similar to a Mouse/Keyboard cable).

The box comes with everything you need to get going. Included in the box was the SignaLink USB unit,6ft  USB-A to USB-B cable (Similar to current USB Printer cable), 2Ft of Rj45 to 6 pin Mini din cable (From the Unit to the radio), 1ft Male to Male audio (stereo) patch cable, Jumper wires, Allen wrench, Software CD (Contains Jumper Diagrams and Various ham radio software) and Manuals.

Nice Rear!!

The initial setup is very easy with the kit I purchased. Just plug the USB cable into SingaLink then into the computer, then plug the Data cable into the SignaLink’s RJ45 jack and plug the 6pin Mini Din into the rear (RTTY/PKT, DATA) Port of your radio.  Depending on your Operating system. The system will automatically recognize the SignaLink and install the default drivers for the sound card that is  in the SignaLink.

The software and radio setup could be a little confusing to some people. But it’s similar to any other interface that is out in the market. The only thing is is really different is that you will now have TWO sound cards  showing up on your computer (Your computers and the SignaLink). You will have to do some on software adjustments for the SignaLink sound card (Labeled “USB Audio Codec” or “USB Audio Device”) and you will have to modify your settings for each software that you use for communications. Tigertronics website provides a great amount of information on how to setup your SignaLink USB to your computer and will provide technical assistance over the phone\e-mail.


On the radio side with the FT-950 I went to menu # 51 (Data Out Lvl) and # 53 (Data V Gain) and changed the value to 90 to max out the levels. If I need to changed the RX and TX levels of the data port I can do so on the fly with the knobs on the SignaLink. I also changed FT-950 to display the ALC meter.

Now it’s time to pick a frequency and start doing some “Digital” Communications. I picked my favorite 14.070mhz. At this point I am adjusting the RX knob on the SignaLink to make sure I am not overdriving the DM-780 software. I keep my level around 40%. If you have the RX knob maxed out (turned fully clockwise) and you are getting less than 10% of audio then check the software settings on the “USB Audio Device” and the settings on your communications software (For example DM-780 has Attenuation level. That box should be turned off or at zero). If it’s still low then check your rigs Data Settings and max out the RX and TX gain

SingaLink In Operation

Once the RX is set, it’s time to start transmitting. Soon as you start transmitting adjust the TX knob so you see nothing on your ALC meter but the power is still at the level you set it at. The picture above shows that I set the power to 20 watts. in the PSK field you really do not need much power. I see a lot of people running high wattage which just makes it hard for others to communicate as they are causing QRM to stations near.

That’s It!

So far I am loving the SignaLink USB. My sound card is now free so that I can listen to music again. Windows OS sounds will no longer be transmitted (DING!), I no longer have to readjust my soundcard for digital. I can also use my microphone jack for it’s intended purpose; for plugging a microphone into. I can switch from digital to SSB in seconds!  I wish I purchased one of these with the radio.

* – I am not tech support for the SignaLink, I just want to show how I went about putting it together. If you have issues please go to http://www.tigertronics.com


Up, Up and Away! (Diamond X510 Installed)

This weekend I worked up the courage and installed my Diamond X510 on my roof. It wasn’t easy due to the pitch of my roof and lack of any safety gear and also making sure the ladder was secured to the house. I don’t picture myself climbing up onto that roof again.

In the above picture I designed and fabricated my own mounting straps to mount the antenna to the cast iron vent pipe.

The support pipe is  galvanized dipped and  then powder coated white to survive the elements

Here are roof brackets just after being cut with the 4kw laser. Brackets are made of 14ga (0.074) Staintless
All the hardware used in the installation was made out of stainless. I didn’t want a nice trail of rust running down my roof.

Other than the anxiety of climbing onto my roof , It was fun.  I couldn’t wait to get back into the house, run the RG213 through the wall and start transmitting.

Using Diamonds radiation pattern on the antenna I calculated the coverage of my antenna.

I think it calculated a little too much but it’s pretty close. From moving my antenna from 5ft off the ground to the top of my house using low loss cable and Type-N connectors, I see a major difference and wondered why I never bought a commercially built antenna. I notice that I can now hit stations further north from my QTH. before I couldn’t get past 10mi north. Now I can hit the W1UWS repeater on top of  Mt. Ascutney in Ascutney VT (100mi north of my QTH) and I could now hit Mt. Graylock in N. Adams MA  (60mi Northwest of my QTH) and many repeaters in the Berkshires. In the south direction I can now get repeaters in Litchfield and Hartford Counties in CT.  Compared to the J-Poles I can now contact 40 additional 2m repeaters. So overall I am extremely pleased of the results.

Now to get the Butternut Installed.


W1AW – Revisited


Having Friday off from work I planned to go back to the ARRL HQ located in Newington CT.  This time I took a tour and got to operate W1AW which was exciting. Upon arrival you have to check in with the secretary for either a tour and/or use of W1AW. I choose to take the tour since I’m interested . My tour guide was a very nice gentleman named Dan Arnold (W1CNI) who is a volunteer tour guide. He took me around the ARRL headquaters to different parts and departments of the building.

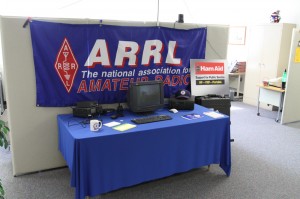
One area he took me was to the Ham Aid table.

These Ham Aid Go Kits consist of a couple of transceivers to help provide communications to disaster areas. Haiti and Louisiana were just a couple of places that received kits. Behind the partition are kits ready to be sent. It’s great to see that at least something is being sent.

Another area that I was shown was the QSL Department.

Rose-Anne, KB1DMW

Looks sort of like an old style mail room. It’s rose-annes job to sort all the QSL cards that come into the ARRL Headquaters by country destination, box them up and prepare them for shipping all around the world. It’s a nice sight to see that people are still using QSL cards in the electronic age where everything is “E” this and “E” that. I would rather get a QSL card in the mail than a E-QSL card.

The one area I wanted to see inside ARRL headquaters is the lab. However the lab is undergoing renovations and was completely gutted. They hope for completion in early April. So maybe another time I will go back to check out the lab.

Across the parking lot is the Hiram Percy Maxium W1AW building.

(Should have taken a picture of the building… Doi!)

Inside W1AW is some history on the ARRL’s Co-Founder, Hiram Percy Maxim. There is also 3 studios filled with transceivers, D-Star/Echolink desk and a bank of equipment used for transmissions of their bulletins. Licensed Amateurs are allow to use some of the equipment in W1AW. I got to operate 15meters SSB.

N1BMX AT W1AW

Here I am operating 15M at W1AW. It’s a little (just a little) nerve racking operating their equipment. First off, It’s not mine. I didn’t want to hit a wrong switch or change a setting that I was not supposed to. Another thing is that it’s hard to say a different call other than your own. But after a couple of minutes I worked Aruba, Italy and England. I just wish I had the equipment they had.

Frandy (N1FJ) at W1AW
Matt (W1MSW) At W1AW

While at ARRL I ran into four nice people that are members of a club that I recently joined. It’s a small New England world. One of which I took a class that he taught (No, Not grammer class!) on Ham radio back in the late 90’s.

Here is some of their equipment they used in broadcasting. So all of the CW runs and bulletins originate here.

Here is the desk with their D-Star equipment and Echolink setup.

Overall I had a great day and If time allotted, I would have stayed a lot longer and snapped more photos. If your a ARRL member and in the area during the weekday, I would stop in and either visit and/or take a tour.


My Diamond X510NA 2M/70CM Antenna

Last week I managed to get a Diamond X510NA antenna for free! The only issue was that I had to go and retrieve the antenna off the roof and also remove another antenna which I also got to keep. Not sure what the other antenna is but my focus is on the Diamond X510NA. This is my first “Commercial” VHF/UHF antenna. All my previous antennas were home brews which performed just great.

When I got the antenna down, nature has taken it’s course and there was corrosion of the visible metal parts and the white lacquer coating is gone exposing the fiberglass tube. However the tubes were still intact and the copper inside looked great for the most part

In this closeup you can see the minor issues that nature caused.


I was determined to get this antenna looking and performing like it was new.  So I went to the hardware store to look for plastic spray paint  and rubber foam strips for sealing  joints around doors to keep drafts at bay.

Here is a photo with the Rubber foam stripping rolled around where the old foam was. I am doing this to prevent the actual antenna from rattling around inside the tubing.

I designed a bracket to use for the roof  installation. The straps will be made out of 14ga (.074″) stainless and I already acquired a 1.25″ I.D. galvanized pipe and had it powder coated white to match the rest of the antenna. I don’t want any rust up there.

Here is the finished antenna. I mounted it to the deck with zip-ties to make sure the antenna works before going onto the roof.

Here is another angle of the antenna. The joints and feedline were taped with “X-Treme Tape” which is a silicone based
tape that will make a watertight seal. I also used “Undercoat” rubberized spray where the radials are mounted to prevent any more corrosion to the base.

There is a night and day difference compared to my home made antennas. Even though it’s 5ft off the ground and the huge aluminum siding wall right next to it, I am hitting repeaters that I never could hit before. Can’t wait to get this up on the roof.