CQWW CW Contest 2015 – Soapbox

CQlogo

This weekend was what some consider to be the biggest CW contest of the year. It appears the last time I attempted this contest (or at least submitted a log) was in 2011 and I made 19,266 points. I guess that’s my goal but I know I can easily beat that so I bumped it to 250k. Since I did over 1 million in SSB, I should at least do 250k… right?

CW Contesting without knowing much CW

Yep, I still have a lot of trouble decoding CW with my head. But that is not going to stop me from trying. I think contesting is beneficial when it come to learning even though I don’t think CQWW should be the place to do it. But I did it anyway.
I entered as “assisted” meaning that I will be using the skimmer/cluster/network or whatever you want to call it to help make contact with other ops.

What I am doing is depending on other people and/or software that will decode those calling CQ and letting me (the network) know exactly where they are. That’s perfect for me because if I have an idea of what the callsign will be, It’s much easier to make the contact.

Skimmer Vs. Spotter

I used two different networks to show me who and where the other operators are. One such network is the spotting network. Think of it as an online chatroom where other operators tell you where other operators are on the bands as they make contact.  Most likely their logging software is setup to send out a message whenever contact is made automatically. Other people using similar software will take that information and display it on a chart where the operator could click on the spot and the logbook would partially fill out and the radio could even tune to it. The software might even color code the spots to let you know if that operator is a multiplier that you need to make contact with. It’s been in use for a long time now and many contesters take advantage of it to increase rates since you are no longer have to search for a signal.

The other network I used is what is known as the Reverse Beacon Network (RBN) or “Skimmer”. Its similar to the spotting network except it’s fully automated. It’s not depending on human input. There are hundreds of Software Defined Radio (SDR) rigs throughout the world listening to the bands. A popular piece of software known as “CW Skimmer” will listen to the bandwidth of the SDR and decode any CW signal being sent using a sophisticated algorithm based on Bayesian statistics. If the skimmer picks up anyone sending “CQ” or “Test” or other keywords, it will note the callsign, frequency, sending speed, and even signal strength and send it along to RBN or it’s own network which will end up on your screen if it’s supported and enabled.

I use RBN to usually test to see how far my CW signal can be heard. It’s great for testing out the various CW kits I’ve built. It tells me the Signal to Noise Ratio (SNR) and it’s another confirmation that I am indeed on frequency.

In contesting both RBN and the Spotting network can help. However it will most likely put you into a different category. There is some controversy over using the networks and some consider it flat out cheating since you are being fed information that could give you an advantage compared to the operator that is not using the network and having to manually search for their contacts. However it’s becoming more accepted.

There is one big problem with using the either network. You can never trust it… ever. With the spotting cluster, you are depending on other people. Those people might not have copied the callsign correctly or there are some evil doers out there that will send out false contacts in hopes to mess you up. The RBN is even less trusting. I don’t think software decoding will ever be perfected to match the experienced human ear. Even though it’s extremely impressive when you look more into it, there is still a lot of bad spots coming from RBN. Even though I wouldn’t trust both, it’s a very useful tool if you want high scores and rates.

I have to look into making the Spotting Network/RBN work better for me. With RBN I just connected to their telnet network and was FLOODED with information. It was so much that it was causing my computer to bog down which affected my CW keyer. It was causing delays and even locking the TX. I ended up having to disconnect and go back to a spotting cluster. There are ways to filter out RBN results to just include decodes from your area/region/zone

If it wasn’t for these networks, I wouldn’t be looking forward to CW contesting. I hope I do enough CW to where I can do some contests without having to use the networks.

Now on to the contest

I’m entering as SOAB(A)LP which means Single Operator, All Bands, Assisted and using Low Power. When it comes to digital and CW contests, I just don’t trust my amplifier so I run low power.

The contest starts at 7pm local on Friday night. However there is a VE exam the same night and I would prefer to be there instead of being on the air. After the exam, I went on 40m and 80m, made a handful of contacts and went to bed.

When I woke up on Saturday and got on the air, EU was booming in on 15m so I spent most of my time on there. My Yagi is tuned for SSB so CW contesting is a no-no since my tuner is not inline with the beam. I could have hooked it up but it’s something I didn’t want to do. That basically cancels out the CW portion of 10m and most of the CW portion of 20 using the beam. I did 20m and 40m off my vertical and kept the G5RV on 80m.

Not really feeling this contest so I didn’t put much effort into rates.

Sunday wasn’t any better. I couldn’t hear much on 10m so I stuck to 15m with the occasional trip to 20m. Towards the end of the contest I was excited to make contact with Alaska and Hawaii since I need LoTW confrimations for Worked All States Triple Play Award. Those contacts and some JA contacts made me very happy.

My CW decoding improved greatly towards the end of the contest. Even though I was still using the cluster, I was able to confirm the calls much faster. Caught a lot of busted calls much easier.
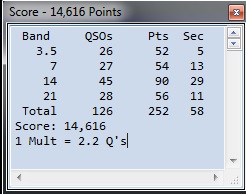
Claimed Results 

NT1kCQWWCW15Score

I ended up making 255 contacts with 143 band countries and 44 band zones which gives me a total of 134,079 points. I spent about 7 hours on the air. I didn’t reach my 250k but I shattered my 2011 score and I had a good time. Hopefully I get some new countries confirmed and I hope AK and HI confirm as well.

I just love how much faster CW contesting is compared to SSB. At least it felt that way for me. I am sure it would become better and faster after I really learn CW.

Thanks for reading,
Jeff (NT1K)

ARRL Sweepstakes CW – Soap Box

Another weekend, another contest. This time it was the ARRL Sweepstakes for CW. I’ve never participated in SS before so it was going to be interesting. Sweepstakes is a US/Canada contest where it’s known for having a long exchange. It consists of a  serial number, class, callsign, check (licensed year) and ARRL section. For this contest I would have to send “123 U NT1K 99 WMA”. That is much longer than the “599 5” sent in CQWW. The exchange is so long as it simulating sending traffic.

Going to try this without a decoder

I wanted to see how well I can do so I turned off the decoder in the K3 and I avoided any software aids. I entered using the unlimited class expecting that I was going to use the skimmer to at least help me get the callsign correct. After struggling with the first couple of contacts, I had enough and fired up decoder. It would take 5 or six contacts before I decided to throw my call out. I wanted to make sure that they didn’t have to do any additional work. Sometimes I would wait too long and the operator calling CQ would move on. Once the decoder was running, I would only search for loud stations.

Do not ever trust the skimmer/cluster

Depending on the contest, you can use the skimmer and/or cluster to make contesting a bit easier. It’s basically a network where other operators “spot” the callsigns and frequencies of people they just made contact with. If you are connected, it would alert you where other operators are. If you are configured correctly, you can just click on the callsign, your radio will tune to that station and your logbook is already partially filled out. It’s a great way to increase your score because you will be able to easily find multipliers and hopefully work them.  However there is a couple downsides. It will put you into a different class/category where it might be harder to win and the information going over the cluster might not be accurate.

During SSB contests, the cluster is being fed with information provided by the operator. If he/she didn’t hear the callsign correctly, they could easily spot a wrong callsign. Most times it’s an honest mistake but there are times I’ve seen people purposely throw out false spots to laugh at those who blindly follow the cluster. There are some anti-skimmer/cluster contesters who think it’s cheating.

With CW contesting, it’s a different story. There is now software called “skimmers” that will listen to entire CW sections of bands and decode any CW and post it to the network. This almost takes out the human error factor but as I found out this weekend many times, information on skimmer could be just as bad. Things like signal to noise ratio (SNR), QRM, band changes, overdriven signals and even horrible spacing or sending from the operator can confuse the skimmer into giving a bad spot.

There has been many times this weekend where I would see multiple spots on the same frequency with different but similar callsigns. It just goes to show that you should never believe what you see on the cluster! Confirm the call before contacting because it might be wrong call or a dupe.

This wasn’t a serious effort.

I barely know CW and there is no way I can predict the exchange. I guess that’s why some really like this contest. It’s difficult for the new CW operator.
At first I wanted to see what I can do without using the cluster. For every one contact I made, I had to listen to 6 contacts before I know the call and exchange they used. After about a couple contacts, I abandoned using my ear and fired up the decoding software.

I thought I would be relying on the skimmer for the contest but I’ve barely used it. You can’t tell you are working a multiplier until you hear the exchange being sent. What I ended up doing was turning off the skimmer/spotter and clearing out the band map. I would just spin the dial around until I heard a loud CQ. There was so many people on the air that I didn’t have to spin it much. If they acknowledge someone else or I caught it in mid-exchange, I would note the callsign down on my bandmap. If they are a multiplier or a State I needed for Triple play, I would wait. Otherwise I would move on and later go back.
I just spinning until I hear “Dah dit dah dit, dah dah dit dah  (CQ) or “dit dit dit, dit dit dit” (SS) or “Dah, dit dit dah” (TU).

Improvements from other CW contests

I have been practicing code more and more and I must say it showed. I didn’t have to depend on the decoder as much but I would like to do a contest where I didn’t have load it up. I would like to run for change.

Claimed score

ARRLSSCW2015

Claiming 14,616 points. I wish I committed more time. I wanted to do a clean sweep and work multiple needed states for triple play.

It was a great time, the K3 and the serial keying worked without issue and now I can’t wait for CQWW CW contest.

Thanks for reading,
Jeff – NT1K


My Mountain Topper Radio project

After doing some portable operations with the KX3, I felt that having something smaller and lighter would allow my pack to get smaller and smaller. The only problem is that there is nothing smaller than the KX3 that is comparable unless you get a CW only rig. I decided to get the MTR (Mountain Topper Radio) that was developed by Steve Weber (KD1JV). It’s a 2.5-5W QRP CW rig that gives you the options for two bands.

The problem is that the MTR kits are produced and sold in small quantities with high demand.  I’ve learned that Steve developed a version 2 of the MTR (3 bands) and had a pre-sale. Even though he gave out the wrong URL, people managed to figure out the correct URL and sold out within hours. I found out a tad too late and ended up having my money refunded.

I was a little bummed out. I was very excited that I might get this kit. I’ve never worked with surface mount devices and the CW only aspect of the rig would sort of force me to actually learn CW. After making my disappointment known, a local ham mentioned that he had an unbuilt kit from the orginal run that he might be willing to sell to me. Making fun of him didn’t help but I think the fact that I might learn CW might have compelled him to sell me his kit.

What did I just do?

Once I got my hands on the kit and took it home I inspected it (what ham doesn’t when they get a new toy?). That’s when I saw the components I’ll be dealing with. Very tiny resistors, capacitors and IC’s. The toroids were tiny and were not wounded.  Everything is so… small. I have built ham radio related kits before but they were all through hole meaning that the parts like the resistors and IC’s had legs and pins the fit into the holes. They were large enough to where I can easily work with them.

I am not prepared for surface mount work. My soldering iron is this $10 Radio Shack 35W fixed iron. I knew it was not ideal for SMT as I have tried and failed using that iron. I need to learn how to solder surface mount and I need the proper gear to do it with. I’ve learned over the years that working with the correct tools makes the job much easier.

New Tools In The Shack

I’ve learned the hard way many times over that having the proper tools can make things a lot easier. I feel that I have everything needed for the job except for a soldering iron. I looking at the sub $40 Chinese type irons but I stopped myself from purchasing one. I wanted an iron that can last me for many years so I ended up purchasing a Hakko 888D soldering iron. At around $100 I felt that it was worth the purchase.

The Build. Day One!

Soon as I got the iron in, I went straight to work. Following the assembly guide I started with the IC’s and the MCU. I felt that you are starting with the hardest part of the job by soldering small SMT IC chips with small leads and small gaps. I avoided installing the MCU and DDS chips until the other ICs were installed.  Once all the IC’s were installed, I used a jewelers loop and checked my connections. The MCU was crooked a bit and thought it was still good so I kept chugging along. I installed the resistors on the bottom of the board and called it a night.

20140506_215401

My working area. You’ll see the board with solder, tweezers, assembly manual, solder, 10X  Jewelers loop, desk lamp with magnifying glass and my new soldering iron. When I purchased the soldering iron, I also purchased different sized and shaped tips.

The Build. Day Two

Next day I got back from work and installed everything else.  It wasn’t really bad as I thought. The soldering Iron was tight in some places but it appeared everything went quite well.

smttsd

Here is a close up of my soldering. It could be better but I would say not too bad considering I’ve never done SMT work before.

Power On Time.

I didn’t want to wire up the power, headphones or anything else because I was going to design a case but in order to make sure it worked. I needed to wire it up.  Soon as I hooked up the battery… Nothing!  It did’t lite up, It didn’t beep. The only thing I notice was a slight noise in the headphones. Sounded like the noise of when you turn something on.

What Went Wrong?

As panic starts to set in, I was worried that I now have a nice new expensive brick  on my hands. All that time, energy and money spent on the kit and tools needed seemed be wasted. Out came the jewelers loop and soldering iron. I double checked every connection. Then I took out the multimeter and followed the troubleshooting guide in the manual and started checking voltages coming out of the regulators. Everything was checking out. The only thing I see is that the MCU was a little bit crooked.

I tried re-soldering the MCU but it proved to be very difficult. I used solder wick and suction tools that did not help, the chip would not move for me. For me the only choice was to remove the MCU. But how? After some internet searching I decided to use enameled wire and snake it under the chip where the leads meet the chip. I then touched the soldering iron to the leads and slowly pulled the chip off.

eIpMXvS

Using that method allowed to me to remove the chip, but in the process I damaged the MCU. The above images is not representative of my soldering work. It was more of a panic move and I just wanted to get the chip off without damaging the pads or board. The pads were in great shape and I’m just lucky nothing else happened.

Dealing With Steve Weber

Well it’s obvious the chip will need to be replaced. There are two options available. Beg steve for a new chip or purchase the MCU and flash it using a MSP Launchpad. I almost went the latter because Steve just released V2 and I am sure he was busy dealing with that and life in general but I decided to e-mail him anyways.

Dealing with Steve was a pleasure. I know these radios is not his full time job but he replied within a reasonable time and he was willing to send out a pre-programmed chip for my version of the MTR. Since I was having him sending me stuff, I purchased a case because the price he was asking was more than fair.

Attempt #2

Now that I have the new MCU, I promptly installed it. This time I quadruple check to make sure the chip was aligned properly before soldering. It went much better.

9xY2xy6

When I applied power I jumped for Joy as I saw the LED come to life and the sounds of CW in my headphone. I did some initial testing and then installed the last toroid.

It’s… ALIVE!!! ALIVE!!!  

Now that it turns on, it’s time to make the adjustments needed for proper operation. Thankfully I have Acquired the test gear I needed over the years from mostly local hams looking to clean their shack. I have a decent frequency counter, oscilloscope and a station monitor.

The manual found on the Yahoo Groups page provided step by step installation and tuning. It made things a lot easier.

20140525_093919

First thing I did was adjusted the reference oscillator frequency to match exactly 10MHz. This was very easy. Just pushing a button until I see 10Mhz on the counter. There are reference points on the board to where you can easily measure things.

20140525_094159

Adjusting the LO to find the center of the passband. This was a little tricky because I didn’t fully understand the manual and process. In the tuning mode the MCU sends out a tone and I adjusted it by watching the signal peaking on my scope while counting the steps between the peaks. I then went backwards only half of the steps. Hopefully it was done correctly. For me, this was the hardest part of tuning.

20140525_095042

Here I am adjusting the receivers filters. With the station monitor I injected a signal into the MTR through the antenna port and adjust the band capacitors until the signal was at it’s loudest. I did the same thing on the other band. This was quite easy.

Last thing I did was hooked it up to a dummy load and checked for output wattage. Using a variable power supply and a DMM hooked in-line, I’ve sent out a tuning signal and adjusted the power supply until the DMM read 9Vdc with a TX load. I was seeing approx 2.5W which is within spec.

Time to get one the air

Now that it’s built and tested, It’s time to get on the air and see what I can (not) do.

20140525_100322

Heh, it’s smaller than my paddle.  What’s great about CW is that you don’t have to call CQ over and over again hoping someone would come back to give you a signal report. Just call CQ a couple times and head over to the Reverse Beacon Network where you can see almost in real time where your signal is being heard. There are receivers all over the world scanning the bands for signals.

TdHhvUi

Here are my results using just a crappy 9V battery. I am pleased to see that not only are stations hearing my signal, but they are on the frequencies that the MTR is tuned to. While I was testing the worst thing happened… Someone replied. I tried very much to work the person. I know the call was a K2 something but that’s all I could make out.

Final Thoughts

This was my first actual kit that I built, It’s also the first time that I ever worked with tiny surface mount devices and even though I messed up the MCU, it was really fun to build. Soldering SMD seems to be a nightmare but after the first couple of parts, it felt real easy and it felt that I was working much quicker compared to through hole parts. This project is also a big kick in the ass to learn CW because I want to use this rig. I’m all about packing very lite when it comes to SOTA and even though I love the KX3, I feel it would be more of an adventure using the MTR. We’ll see.

Thanks for reading!

– Jeff


NT1K’s Ham Radio Website Of The Week – 5/9/2013 – LCWO.net

For this weeks WOTW, I picked LCWO.net otherwise known as Learn CW online. If you even want to learn CW (Morse Code) I would strongly suggest this website to use as a tool to make learning easier.

From LCWO.net

A new website to learn and practice Morse telegraphy has been launched:
http://lcwo.net/ - Learn CW Online

There are already hundreds of training programs, MP3/CD courses and practice
aids available, but LCWO follows a radically different concept: While sticking
to  well-proven methods for learning and practice, all you need for using LCWO
is a web browser!

This gives the user the liberty to practice CW wherever an internet connection
is available, always retaining the personal settings, scores and statistics.

Currently the site, which is available in 27 languages offers a complete
Koch method Morse course, code group practice, callsign- and plain text training
modes and also allows to convert random text to Morse MP3s.

A high score list is available to compare results with other users, personal
statistics help to track training progress.

LCWO.net is a non-commercial project. Creating a free account only takes a few
seconds, and you can start practicing CW right away!

Fabian Kurz, DJ1YFK

It  has a decent layout and after making an account, it will track your progress. I’ve used this site many times. My favorite part being the Morse Machine which is the same as this piece of software

Now maybe I should learn Morse Code…. Some day!

– NT1K

CQWW CW Contest / Rants

I decided to participate in CQ Magazine’s World Wide CW (Morse Code) contest. It’s one of the, If not the biggest CW contest of the year.
I have been trying to learn CW off and on since the summer so I needed some help if I were to even make one QSO on CW. I setup N1MM logging software for the contest and used DM-780 that comes with Ham Radio Deluxe to decode and encode the CW.
Since I never participated in a CW contest before I wanted to see how it worked so I can configure my macros to work with the contest. I was very impressed on how fast contacts and exchanges are made. It’s way faster compared to SSB, RTTY and PSK31 and I felt even more compelled to learn CW after playing in this contest. I worked the contest off and on so I wouldn’t get overwhelmed about the activity. I started off searching and pouncing (S&P) on only the strongest signals. I would wait until I have their full call and exchange before even attempting to contact the station. N1MM does help out by looking up the CQ zone which came in handy a couple of times. After establishing contact I would get the typical 599 and zone exchange. After the first night working the contest. I have learned what my new call sounds coming back to me and phrases like “TU”, “TEST”, “?” and some of the shortcuts ops used to make a faster contact like instead of a RST of 599, it will be 5NN and A5 would be zone 15. I went to bed with code buzzing around in my head. I woke up the next day to play again. I’ve managed to make 100 contacts even though I know for a fact that I can make more. I just wanted to see what it was like to play in a CW and I liked it. Nothing like just jumping right in with both feet and absorbing everything. Once you learn the key terms in code the contest went much easier. I would encourage ops who want to learn CW to work in a contest. After learning what some of the stuff sounds like, the only trouble would be on decoding the call sign. I just hope that the people on the other end got my call right.

This now leads me to my rant. I lurk around on a lot of Ham radio related forums and also hear it by ear. I see a lot of people saying something along the lines of “These No-Coders are going to ruin HF” and “Amateur Radio is going to be just like CB” because the FCC dropped the Morse code requirement years after many other countries dropped the requirement. Now all these “Techies” or Technician license holders are upgrading to general and/or extra without passing a Morse code proficiency test.
After spending a couple of years on HF I have not seen much (or any) evidence to support this claim that has been spewing out of the elders mouths for over 4 years now. A lot of the Issues I see have a lot to do with elder hams. For example, when it comes to contacting a DX station I see a lot of things happening. Things like after the DX station acknowledge someone, there are still people trying to crowbar their callsign in because there is a second of silence. I also hear 1KW amps tuning up RIGHT on frequency of the DX station then spew out their call (like we don’t know who you are when you’re 40+ on my meter). Then you got those that see a massive pileup trying to contact the station and when acknowledged, will try to strike up a rag chew session by describing their town and the weather and their medical ailments even though there are 100’s of people waiting. And if the DX working split… FORGET ABOUT IT! They endlessly send their call even though you have a bunch of people telling him that the DX is listening 5KC up. Try listening to the RX Frequency of the DX station working spilt. Wholly crap there are a lot of people who don’t even come close to following the DX code of conduct. I’ve jotted a bunch of these calls down and looked them up on QRZ to find out that a majority of them are elder hams (By the age of their call and station setup).
For a Hobby that is so-called “Dying”, I wouldn’t spend much time complaining about those who are actually trying to stay interested in Ham radio. Not only should you welcome these “No-Coders”, you should thank them for showing interest. Because with that negative attitude you will drive away the young Hams that are genuinely interested and you will see a truly dead hobby. After a couple of years on HF and thousands of contacts, It’s rare that I run into someone around my age (28). I basically think that those who bitch and moan about it are just jealous or feel that they are “A class of their own” because they had to pass a 20wpm (or 5wpm) CW proficiency test. The funny thing is that since I’ve upgraded, I wanted to learn CW more than ever so I can make even more contacts farther away.
This is just my personal opinion, I could be wrong.

HCRA Field Day 2011

This year I participated in Field Day with the Hampden County Radio Association. Instead of dropping by a site and using their equipment, I decided to offer up my equipment for use as the “HF DIGITAL” station. Other than a couple of software issues, the Digital station was a success with over 170 contacts.

Here are the pictures I’ve taken from Field Day

Check out Hampden County Radio Association’s Website for information about Field Day.
Continue reading “HCRA Field Day 2011”

3/31 Contacts

Since my recent purchase I’ve been back into digital. In the past couple of say 20M in the afternoon has been really good to me

N1BMX Spots On PSK Reporter

I made contact with the following

RK9AN – Anvar -Asiatic Russia
RN3AJK – Artem – Euro Russia
DK9WB – Jakob – Germany
CT2FPY – Leonel – Portugal
M0NPQ – Nerijus – England
DL5MGH – Armin – Germany
IW3SGT – Alessandro – Italy
IZ3LEF – Emiliano – Italy
IW6NBX – Antonio – Italy
SP5GRU – Wlodek – Poland
EA3BJW – Joan – Spain
US5CCO – Vlad – Ukraine
UA3ON – Antoly – Euro Russia
RD3WW – Vladimir – Euro Russia
IN3NHZ – Roberto – Italy
KE5AQD – Roger – USA
W3CRR – Craig – USA
9A4A – Zlatko – Croatia

I have been noticing lately that after sending CQ and acknowledging someone that people are still trying to contact me. I like pileups for me but it’s hard in the digital world. It gets annoying because I’m unable to make out the first half of the conversation because of QRM. I figured like on SSB, once someone acknowledges someone else that everyone else on the frequency remains QRT until the exchange ends??? – END RANT

I also got work K2TPZ on CW. I still have trouble receiving so I cheated and used the computer to receive his CW and used the touch pad to send. I hope by engaging in CW more and more that the dits and dahs will automatically turn into letters and words

CW Keyer In Fabrication

I had a chance to get started on fabrication of my code keyer.

Code Key Project / Metal
Fabrication on my Code Key Project

It’s nothing much but it’s a start. The vertical keys are spaced 0.75″ apart. I do not have easy access to 3/4″ Material so I’ve made the spacer out of 3 1/4″ Plates of steel. If I waited I could have used two pcs of 3/8″ But I designed it using 1/4″ blocks and the
opportunity was there.

I am not going to post for every part that gets made but when it’s assembled and painted I will talk more about it.

CW Project Underway

I purchased a CW Touch Key Kit which came in on Friday. It was easy to assemble and I have it taped to my desk using drywall ceiling buttons as code keys. My plan is to design and fabricate a Code key.

So far I’ve manage to design the key around the Touch kit.  Here are some of the drawings

The plan is to have two sets of keys. I am not sure what style I wanted so I figured I’ll do both. The base and vertical stand will be laser cut using 3/8″ Steel plate for weight. The enclosure will be 16ga (.062″) Steel with welded corners and the keys will be punched out of 16ga brass.  The vertical keys will be secured using extruded plastic washers to prevent any contact with the other keys and it’s metal base. The Horizontal keys will appear to be floating. However they will be inlayed into 1/4″ Plexiglas. I plan on using a DPDT Switch to activate one set of keys while disabling the other set. The only issue I see that the wires are sensitive to the touch and the switch might cause an issue.